Subscribe To The Newsletter
Get new updates, entertainment, recipes, tips + more!
@import url(“https://groot.mailerlite.com/assets/plugins/groot/modules/includes/groot_fonts/import.css?version=1653942″);
/* LOADER */
.ml-form-embedSubmitLoad {
display: inline-block;
width: 20px;
height: 20px;
}
.g-recaptcha {
transform: scale(1);
-webkit-transform: scale(1);
transform-origin: 0 0;
-webkit-transform-origin: 0 0;
height: ;
}
.sr-only {
position: absolute;
width: 1px;
height: 1px;
padding: 0;
margin: -1px;
overflow: hidden;
clip: rect(0,0,0,0);
border: 0;
}
.ml-form-embedSubmitLoad:after {
content: ” “;
display: block;
width: 11px;
height: 11px;
margin: 1px;
border-radius: 50%;
border: 4px solid #fff;
border-color: #ffffff #ffffff #ffffff transparent;
animation: ml-form-embedSubmitLoad 1.2s linear infinite;
}
@keyframes ml-form-embedSubmitLoad {
0% {
transform: rotate(0deg);
}
100% {
transform: rotate(360deg);
}
}
#mlb2-581356.ml-form-embedContainer {
box-sizing: border-box;
display: table;
margin: 0 auto;
position: static;
width: 100% !important;
}
#mlb2-581356.ml-form-embedContainer h4,
#mlb2-581356.ml-form-embedContainer p,
#mlb2-581356.ml-form-embedContainer span,
#mlb2-581356.ml-form-embedContainer button {
text-transform: none !important;
letter-spacing: normal !important;
}
#mlb2-581356.ml-form-embedContainer .ml-form-embedWrapper {
background-color: #ffffff;
border-width: 0px;
border-color: transparent;
border-radius: 0px;
border-style: solid;
box-sizing: border-box;
display: inline-block !important;
margin: 0;
padding: 0;
position: relative;
}
#mlb2-581356.ml-form-embedContainer .ml-form-embedWrapper.embedPopup,
#mlb2-581356.ml-form-embedContainer .ml-form-embedWrapper.embedDefault { width: 100%; }
#mlb2-581356.ml-form-embedContainer .ml-form-embedWrapper.embedForm { max-width: 100%; width: 100%; }
#mlb2-581356.ml-form-embedContainer .ml-form-align-left { text-align: left; }
#mlb2-581356.ml-form-embedContainer .ml-form-align-center { text-align: center; }
#mlb2-581356.ml-form-embedContainer .ml-form-align-default { display: table-cell !important; vertical-align: middle !important; text-align: center !important; }
#mlb2-581356.ml-form-embedContainer .ml-form-align-right { text-align: right; }
#mlb2-581356.ml-form-embedContainer .ml-form-embedWrapper .ml-form-embedHeader img {
border-top-left-radius: 0px;
border-top-right-radius: 0px;
height: auto;
margin: 0 auto !important;
max-width: 100%;
width: 798px;
}
#mlb2-581356.ml-form-embedContainer .ml-form-embedWrapper .ml-form-embedBody,
#mlb2-581356.ml-form-embedContainer .ml-form-embedWrapper .ml-form-successBody {
padding: 20px 20px 0 20px;
}
#mlb2-581356.ml-form-embedContainer .ml-form-embedWrapper .ml-form-embedBody.ml-form-embedBodyHorizontal {
padding-bottom: 0;
}
#mlb2-581356.ml-form-embedContainer .ml-form-embedWrapper .ml-form-embedBody .ml-form-embedContent,
#mlb2-581356.ml-form-embedContainer .ml-form-embedWrapper .ml-form-successBody .ml-form-successContent {
text-align: left;
margin: 0 0 20px 0;
}
#mlb2-581356.ml-form-embedContainer .ml-form-embedWrapper .ml-form-embedBody .ml-form-embedContent h4,
#mlb2-581356.ml-form-embedContainer .ml-form-embedWrapper .ml-form-successBody .ml-form-successContent h4 {
color: #000000;
font-family: ‘Playfair Display’, sans-serif;
font-size: 28px;
font-weight: 400;
margin: 0 0 10px 0;
text-align: center;
word-break: break-word;
}
#mlb2-581356.ml-form-embedContainer .ml-form-embedWrapper .ml-form-embedBody .ml-form-embedContent p,
#mlb2-581356.ml-form-embedContainer .ml-form-embedWrapper .ml-form-successBody .ml-form-successContent p {
color: #000000;
font-family: ‘Montserrat’, sans-serif;
font-size: 13px;
font-weight: 400;
line-height: 19px;
margin: 0 0 10px 0;
text-align: center;
}
#mlb2-581356.ml-form-embedContainer .ml-form-embedWrapper .ml-form-embedBody .ml-form-embedContent ul,
#mlb2-581356.ml-form-embedContainer .ml-form-embedWrapper .ml-form-embedBody .ml-form-embedContent ol,
#mlb2-581356.ml-form-embedContainer .ml-form-embedWrapper .ml-form-successBody .ml-form-successContent ul,
#mlb2-581356.ml-form-embedContainer .ml-form-embedWrapper .ml-form-successBody .ml-form-successContent ol {
color: #000000;
font-family: ‘Montserrat’, sans-serif;
font-size: 13px;
}
#mlb2-581356.ml-form-embedContainer .ml-form-embedWrapper .ml-form-embedBody .ml-form-embedContent ol ol,
#mlb2-581356.ml-form-embedContainer .ml-form-embedWrapper .ml-form-successBody .ml-form-successContent ol ol {
list-style-type: lower-alpha;
}
#mlb2-581356.ml-form-embedContainer .ml-form-embedWrapper .ml-form-embedBody .ml-form-embedContent ol ol ol,
#mlb2-581356.ml-form-embedContainer .ml-form-embedWrapper .ml-form-successBody .ml-form-successContent ol ol ol {
list-style-type: lower-roman;
}
#mlb2-581356.ml-form-embedContainer .ml-form-embedWrapper .ml-form-embedBody .ml-form-embedContent p a,
#mlb2-581356.ml-form-embedContainer .ml-form-embedWrapper .ml-form-successBody .ml-form-successContent p a {
color: #000000;
text-decoration: underline;
}
#mlb2-581356.ml-form-embedContainer .ml-form-embedWrapper .ml-block-form .ml-field-group {
text-align: left!important;
}
#mlb2-581356.ml-form-embedContainer .ml-form-embedWrapper .ml-block-form .ml-field-group label {
margin-bottom: 5px;
color: #333333;
font-size: 14px;
font-family: ‘Open Sans’, Arial, Helvetica, sans-serif;
font-weight: bold; font-style: normal; text-decoration: none;;
display: inline-block;
line-height: 20px;
}
#mlb2-581356.ml-form-embedContainer .ml-form-embedWrapper .ml-form-embedBody .ml-form-embedContent p:last-child,
#mlb2-581356.ml-form-embedContainer .ml-form-embedWrapper .ml-form-successBody .ml-form-successContent p:last-child {
margin: 0;
}
#mlb2-581356.ml-form-embedContainer .ml-form-embedWrapper .ml-form-embedBody form {
margin: 0;
width: 100%;
}
#mlb2-581356.ml-form-embedContainer .ml-form-embedWrapper .ml-form-embedBody .ml-form-formContent,
#mlb2-581356.ml-form-embedContainer .ml-form-embedWrapper .ml-form-embedBody .ml-form-checkboxRow {
margin: 0 0 20px 0;
width: 100%;
}
#mlb2-581356.ml-form-embedContainer .ml-form-embedWrapper .ml-form-embedBody .ml-form-checkboxRow {
float: left;
}
#mlb2-581356.ml-form-embedContainer .ml-form-embedWrapper .ml-form-embedBody .ml-form-formContent.horozintalForm {
margin: 0;
padding: 0 0 20px 0;
width: 100%;
height: auto;
float: left;
}
#mlb2-581356.ml-form-embedContainer .ml-form-embedWrapper .ml-form-embedBody .ml-form-fieldRow {
margin: 0 0 10px 0;
width: 100%;
}
#mlb2-581356.ml-form-embedContainer .ml-form-embedWrapper .ml-form-embedBody .ml-form-fieldRow.ml-last-item {
margin: 0;
}
#mlb2-581356.ml-form-embedContainer .ml-form-embedWrapper .ml-form-embedBody .ml-form-fieldRow.ml-formfieldHorizintal {
margin: 0;
}
#mlb2-581356.ml-form-embedContainer .ml-form-embedWrapper .ml-form-embedBody .ml-form-fieldRow input {
background-color: #ffffff !important;
color: #333333 !important;
border-color: #cccccc;
border-radius: 4px !important;
border-style: solid !important;
border-width: 1px !important;
font-family: ‘Montserrat’, sans-serif;
font-size: 14px !important;
height: auto;
line-height: 21px !important;
margin-bottom: 0;
margin-top: 0;
margin-left: 0;
margin-right: 0;
padding: 10px 10px !important;
width: 100% !important;
box-sizing: border-box !important;
max-width: 100% !important;
}
#mlb2-581356.ml-form-embedContainer .ml-form-embedWrapper .ml-form-embedBody .ml-form-fieldRow input::-webkit-input-placeholder,
#mlb2-581356.ml-form-embedContainer .ml-form-embedWrapper .ml-form-embedBody .ml-form-horizontalRow input::-webkit-input-placeholder { color: #333333; }
#mlb2-581356.ml-form-embedContainer .ml-form-embedWrapper .ml-form-embedBody .ml-form-fieldRow input::-moz-placeholder,
#mlb2-581356.ml-form-embedContainer .ml-form-embedWrapper .ml-form-embedBody .ml-form-horizontalRow input::-moz-placeholder { color: #333333; }
#mlb2-581356.ml-form-embedContainer .ml-form-embedWrapper .ml-form-embedBody .ml-form-fieldRow input:-ms-input-placeholder,
#mlb2-581356.ml-form-embedContainer .ml-form-embedWrapper .ml-form-embedBody .ml-form-horizontalRow input:-ms-input-placeholder { color: #333333; }
#mlb2-581356.ml-form-embedContainer .ml-form-embedWrapper .ml-form-embedBody .ml-form-fieldRow input:-moz-placeholder,
#mlb2-581356.ml-form-embedContainer .ml-form-embedWrapper .ml-form-embedBody .ml-form-horizontalRow input:-moz-placeholder { color: #333333; }
#mlb2-581356.ml-form-embedContainer .ml-form-embedWrapper .ml-form-embedBody .ml-form-fieldRow textarea, #mlb2-581356.ml-form-embedContainer .ml-form-embedWrapper .ml-form-embedBody .ml-form-horizontalRow textarea {
background-color: #ffffff !important;
color: #333333 !important;
border-color: #cccccc;
border-radius: 4px !important;
border-style: solid !important;
border-width: 1px !important;
font-family: ‘Montserrat’, sans-serif;
font-size: 14px !important;
height: auto;
line-height: 21px !important;
margin-bottom: 0;
margin-top: 0;
padding: 10px 10px !important;
width: 100% !important;
box-sizing: border-box !important;
max-width: 100% !important;
}
#mlb2-581356.ml-form-embedContainer .ml-form-embedWrapper .ml-form-embedBody .ml-form-fieldRow .custom-radio .custom-control-label::before, #mlb2-581356.ml-form-embedContainer .ml-form-embedWrapper .ml-form-embedBody .ml-form-horizontalRow .custom-radio .custom-control-label::before, #mlb2-581356.ml-form-embedContainer .ml-form-embedWrapper .ml-form-embedBody .ml-form-fieldRow .custom-checkbox .custom-control-label::before, #mlb2-581356.ml-form-embedContainer .ml-form-embedWrapper .ml-form-embedBody .ml-form-horizontalRow .custom-checkbox .custom-control-label::before, #mlb2-581356.ml-form-embedContainer .ml-form-embedWrapper .ml-form-embedBody .ml-form-embedPermissions .ml-form-embedPermissionsOptionsCheckbox .label-description::before, #mlb2-581356.ml-form-embedContainer .ml-form-embedWrapper .ml-form-embedBody .ml-form-interestGroupsRow .ml-form-interestGroupsRowCheckbox .label-description::before, #mlb2-581356.ml-form-embedContainer .ml-form-embedWrapper .ml-form-embedBody .ml-form-checkboxRow .label-description::before {
border-color: #cccccc!important;
background-color: #ffffff!important;
}
#mlb2-581356.ml-form-embedContainer .ml-form-embedWrapper .ml-form-embedBody .ml-form-fieldRow input.custom-control-input[type=”checkbox”]{
box-sizing: border-box;
padding: 0;
position: absolute;
z-index: -1;
opacity: 0;
margin-top: 5px;
margin-left: -1.5rem;
overflow: visible;
}
#mlb2-581356.ml-form-embedContainer .ml-form-embedWrapper .ml-form-embedBody .ml-form-fieldRow .custom-checkbox .custom-control-label::before, #mlb2-581356.ml-form-embedContainer .ml-form-embedWrapper .ml-form-embedBody .ml-form-horizontalRow .custom-checkbox .custom-control-label::before, #mlb2-581356.ml-form-embedContainer .ml-form-embedWrapper .ml-form-embedBody .ml-form-embedPermissions .ml-form-embedPermissionsOptionsCheckbox .label-description::before, #mlb2-581356.ml-form-embedContainer .ml-form-embedWrapper .ml-form-embedBody .ml-form-interestGroupsRow .ml-form-interestGroupsRowCheckbox .label-description::before, #mlb2-581356.ml-form-embedContainer .ml-form-embedWrapper .ml-form-embedBody .ml-form-checkboxRow .label-description::before {
border-radius: 4px!important;
}
#mlb2-581356.ml-form-embedContainer .ml-form-embedWrapper .ml-form-embedBody .ml-form-checkboxRow input[type=checkbox]:checked~.label-description::after, #mlb2-581356.ml-form-embedContainer .ml-form-embedWrapper .ml-form-embedBody .ml-form-embedPermissions .ml-form-embedPermissionsOptionsCheckbox input[type=checkbox]:checked~.label-description::after, #mlb2-581356.ml-form-embedContainer .ml-form-embedWrapper .ml-form-embedBody .ml-form-fieldRow .custom-checkbox .custom-control-input:checked~.custom-control-label::after, #mlb2-581356.ml-form-embedContainer .ml-form-embedWrapper .ml-form-embedBody .ml-form-horizontalRow .custom-checkbox .custom-control-input:checked~.custom-control-label::after, #mlb2-581356.ml-form-embedContainer .ml-form-embedWrapper .ml-form-embedBody .ml-form-interestGroupsRow .ml-form-interestGroupsRowCheckbox input[type=checkbox]:checked~.label-description::after {
background-image: url(“data:image/svg+xml,%3csvg xmlns=’http://www.w3.org/2000/svg’ viewBox=’0 0 8 8’%3e%3cpath fill=’%23fff’ d=’M6.564.75l-3.59 3.612-1.538-1.55L0 4.26 2.974 7.25 8 2.193z’/%3e%3c/svg%3e”);
}
#mlb2-581356.ml-form-embedContainer .ml-form-embedWrapper .ml-form-embedBody .ml-form-fieldRow .custom-radio .custom-control-input:checked~.custom-control-label::after, #mlb2-581356.ml-form-embedContainer .ml-form-embedWrapper .ml-form-embedBody .ml-form-fieldRow .custom-radio .custom-control-input:checked~.custom-control-label::after {
background-image: url(“data:image/svg+xml,%3csvg xmlns=’http://www.w3.org/2000/svg’ viewBox=’-4 -4 8 8’%3e%3ccircle r=’3′ fill=’%23fff’/%3e%3c/svg%3e”);
}
#mlb2-581356.ml-form-embedContainer .ml-form-embedWrapper .ml-form-embedBody .ml-form-fieldRow .custom-radio .custom-control-input:checked~.custom-control-label::before, #mlb2-581356.ml-form-embedContainer .ml-form-embedWrapper .ml-form-embedBody .ml-form-horizontalRow .custom-radio .custom-control-input:checked~.custom-control-label::before, #mlb2-581356.ml-form-embedContainer .ml-form-embedWrapper .ml-form-embedBody .ml-form-fieldRow .custom-checkbox .custom-control-input:checked~.custom-control-label::before, #mlb2-581356.ml-form-embedContainer .ml-form-embedWrapper .ml-form-embedBody .ml-form-horizontalRow .custom-checkbox .custom-control-input:checked~.custom-control-label::before, #mlb2-581356.ml-form-embedContainer .ml-form-embedWrapper .ml-form-embedBody .ml-form-embedPermissions .ml-form-embedPermissionsOptionsCheckbox input[type=checkbox]:checked~.label-description::before, #mlb2-581356.ml-form-embedContainer .ml-form-embedWrapper .ml-form-embedBody .ml-form-interestGroupsRow .ml-form-interestGroupsRowCheckbox input[type=checkbox]:checked~.label-description::before, #mlb2-581356.ml-form-embedContainer .ml-form-embedWrapper .ml-form-embedBody .ml-form-checkboxRow input[type=checkbox]:checked~.label-description::before {
border-color: #C0DCE2!important;
background-color: #C0DCE2!important;
color: #ffffff!important;
}
#mlb2-581356.ml-form-embedContainer .ml-form-embedWrapper .ml-form-embedBody .ml-form-fieldRow .custom-radio .custom-control-label::before, #mlb2-581356.ml-form-embedContainer .ml-form-embedWrapper .ml-form-embedBody .ml-form-horizontalRow .custom-radio .custom-control-label::before, #mlb2-581356.ml-form-embedContainer .ml-form-embedWrapper .ml-form-embedBody .ml-form-fieldRow .custom-radio .custom-control-label::after, #mlb2-581356.ml-form-embedContainer .ml-form-embedWrapper .ml-form-embedBody .ml-form-horizontalRow .custom-radio .custom-control-label::after, #mlb2-581356.ml-form-embedContainer .ml-form-embedWrapper .ml-form-embedBody .ml-form-fieldRow .custom-checkbox .custom-control-label::before, #mlb2-581356.ml-form-embedContainer .ml-form-embedWrapper .ml-form-embedBody .ml-form-fieldRow .custom-checkbox .custom-control-label::after, #mlb2-581356.ml-form-embedContainer .ml-form-embedWrapper .ml-form-embedBody .ml-form-horizontalRow .custom-checkbox .custom-control-label::before, #mlb2-581356.ml-form-embedContainer .ml-form-embedWrapper .ml-form-embedBody .ml-form-horizontalRow .custom-checkbox .custom-control-label::after {
top: 2px;
box-sizing: border-box;
}
#mlb2-581356.ml-form-embedContainer .ml-form-embedWrapper .ml-form-embedBody .ml-form-embedPermissions .ml-form-embedPermissionsOptionsCheckbox .label-description::before, #mlb2-581356.ml-form-embedContainer .ml-form-embedWrapper .ml-form-embedBody .ml-form-embedPermissions .ml-form-embedPermissionsOptionsCheckbox .label-description::after, #mlb2-581356.ml-form-embedContainer .ml-form-embedWrapper .ml-form-embedBody .ml-form-checkboxRow .label-description::before, #mlb2-581356.ml-form-embedContainer .ml-form-embedWrapper .ml-form-embedBody .ml-form-checkboxRow .label-description::after {
top: 0px!important;
box-sizing: border-box!important;
}
#mlb2-581356.ml-form-embedContainer .ml-form-embedWrapper .ml-form-embedBody .ml-form-checkboxRow .label-description::before, #mlb2-581356.ml-form-embedContainer .ml-form-embedWrapper .ml-form-embedBody .ml-form-checkboxRow .label-description::after {
top: 0px!important;
box-sizing: border-box!important;
}
#mlb2-581356.ml-form-embedContainer .ml-form-embedWrapper .ml-form-embedBody .ml-form-interestGroupsRow .ml-form-interestGroupsRowCheckbox .label-description::after {
top: 0px!important;
box-sizing: border-box!important;
position: absolute;
left: -1.5rem;
display: block;
width: 1rem;
height: 1rem;
content: “”;
}
#mlb2-581356.ml-form-embedContainer .ml-form-embedWrapper .ml-form-embedBody .ml-form-interestGroupsRow .ml-form-interestGroupsRowCheckbox .label-description::before {
top: 0px!important;
box-sizing: border-box!important;
}
#mlb2-581356.ml-form-embedContainer .ml-form-embedWrapper .ml-form-embedBody .custom-control-label::before {
position: absolute;
top: 4px;
left: -1.5rem;
display: block;
width: 16px;
height: 16px;
pointer-events: none;
content: “”;
background-color: #ffffff;
border: #adb5bd solid 1px;
border-radius: 50%;
}
#mlb2-581356.ml-form-embedContainer .ml-form-embedWrapper .ml-form-embedBody .custom-control-label::after {
position: absolute;
top: 2px!important;
left: -1.5rem;
display: block;
width: 1rem;
height: 1rem;
content: “”;
}
#mlb2-581356.ml-form-embedContainer .ml-form-embedWrapper .ml-form-embedBody .ml-form-embedPermissions .ml-form-embedPermissionsOptionsCheckbox .label-description::before, #mlb2-581356.ml-form-embedContainer .ml-form-embedWrapper .ml-form-embedBody .ml-form-interestGroupsRow .ml-form-interestGroupsRowCheckbox .label-description::before, #mlb2-581356.ml-form-embedContainer .ml-form-embedWrapper .ml-form-embedBody .ml-form-checkboxRow .label-description::before {
position: absolute;
top: 4px;
left: -1.5rem;
display: block;
width: 16px;
height: 16px;
pointer-events: none;
content: “”;
background-color: #ffffff;
border: #adb5bd solid 1px;
border-radius: 50%;
}
#mlb2-581356.ml-form-embedContainer .ml-form-embedWrapper .ml-form-embedBody .ml-form-embedPermissions .ml-form-embedPermissionsOptionsCheckbox .label-description::after {
position: absolute;
top: 0px!important;
left: -1.5rem;
display: block;
width: 1rem;
height: 1rem;
content: “”;
}
#mlb2-581356.ml-form-embedContainer .ml-form-embedWrapper .ml-form-embedBody .ml-form-checkboxRow .label-description::after {
position: absolute;
top: 0px!important;
left: -1.5rem;
display: block;
width: 1rem;
height: 1rem;
content: “”;
}
#mlb2-581356.ml-form-embedContainer .ml-form-embedWrapper .ml-form-embedBody .custom-radio .custom-control-label::after {
background: no-repeat 50%/50% 50%;
}
#mlb2-581356.ml-form-embedContainer .ml-form-embedWrapper .ml-form-embedBody .custom-checkbox .custom-control-label::after, #mlb2-581356.ml-form-embedContainer .ml-form-embedWrapper .ml-form-embedBody .ml-form-embedPermissions .ml-form-embedPermissionsOptionsCheckbox .label-description::after, #mlb2-581356.ml-form-embedContainer .ml-form-embedWrapper .ml-form-embedBody .ml-form-interestGroupsRow .ml-form-interestGroupsRowCheckbox .label-description::after, #mlb2-581356.ml-form-embedContainer .ml-form-embedWrapper .ml-form-embedBody .ml-form-checkboxRow .label-description::after {
background: no-repeat 50%/50% 50%;
}
#mlb2-581356.ml-form-embedContainer .ml-form-embedWrapper .ml-form-embedBody .ml-form-fieldRow .custom-control, #mlb2-581356.ml-form-embedContainer .ml-form-embedWrapper .ml-form-embedBody .ml-form-horizontalRow .custom-control {
position: relative;
display: block;
min-height: 1.5rem;
padding-left: 1.5rem;
}
#mlb2-581356.ml-form-embedContainer .ml-form-embedWrapper .ml-form-embedBody .ml-form-fieldRow .custom-radio .custom-control-input, #mlb2-581356.ml-form-embedContainer .ml-form-embedWrapper .ml-form-embedBody .ml-form-horizontalRow .custom-radio .custom-control-input, #mlb2-581356.ml-form-embedContainer .ml-form-embedWrapper .ml-form-embedBody .ml-form-fieldRow .custom-checkbox .custom-control-input, #mlb2-581356.ml-form-embedContainer .ml-form-embedWrapper .ml-form-embedBody .ml-form-horizontalRow .custom-checkbox .custom-control-input {
position: absolute;
z-index: -1;
opacity: 0;
box-sizing: border-box;
padding: 0;
}
#mlb2-581356.ml-form-embedContainer .ml-form-embedWrapper .ml-form-embedBody .ml-form-fieldRow .custom-radio .custom-control-label, #mlb2-581356.ml-form-embedContainer .ml-form-embedWrapper .ml-form-embedBody .ml-form-horizontalRow .custom-radio .custom-control-label, #mlb2-581356.ml-form-embedContainer .ml-form-embedWrapper .ml-form-embedBody .ml-form-fieldRow .custom-checkbox .custom-control-label, #mlb2-581356.ml-form-embedContainer .ml-form-embedWrapper .ml-form-embedBody .ml-form-horizontalRow .custom-checkbox .custom-control-label {
color: #000000;
font-size: 12px!important;
font-family: ‘Montserrat’, sans-serif;
line-height: 22px;
margin-bottom: 0;
position: relative;
vertical-align: top;
font-style: normal;
font-weight: 700;
}
#mlb2-581356.ml-form-embedContainer .ml-form-embedWrapper .ml-form-embedBody .ml-form-fieldRow .custom-select, #mlb2-581356.ml-form-embedContainer .ml-form-embedWrapper .ml-form-embedBody .ml-form-horizontalRow .custom-select {
background-color: #ffffff !important;
color: #333333 !important;
border-color: #cccccc;
border-radius: 4px !important;
border-style: solid !important;
border-width: 1px !important;
font-family: ‘Montserrat’, sans-serif;
font-size: 14px !important;
line-height: 20px !important;
margin-bottom: 0;
margin-top: 0;
padding: 10px 28px 10px 12px !important;
width: 100% !important;
box-sizing: border-box !important;
max-width: 100% !important;
height: auto;
display: inline-block;
vertical-align: middle;
background: url(‘https://cdn.mailerlite.com/images/default/dropdown.svg’) no-repeat right .75rem center/8px 10px;
-webkit-appearance: none;
-moz-appearance: none;
appearance: none;
}
#mlb2-581356.ml-form-embedContainer .ml-form-embedWrapper .ml-form-embedBody .ml-form-horizontalRow {
height: auto;
width: 100%;
float: left;
}
.ml-form-formContent.horozintalForm .ml-form-horizontalRow .ml-input-horizontal { width: 70%; float: left; }
.ml-form-formContent.horozintalForm .ml-form-horizontalRow .ml-button-horizontal { width: 30%; float: left; }
.ml-form-formContent.horozintalForm .ml-form-horizontalRow .ml-button-horizontal.labelsOn { padding-top: 25px; }
.ml-form-formContent.horozintalForm .ml-form-horizontalRow .horizontal-fields { box-sizing: border-box; float: left; padding-right: 10px; }
#mlb2-581356.ml-form-embedContainer .ml-form-embedWrapper .ml-form-embedBody .ml-form-horizontalRow input {
background-color: #ffffff;
color: #333333;
border-color: #cccccc;
border-radius: 4px;
border-style: solid;
border-width: 1px;
font-family: ‘Montserrat’, sans-serif;
font-size: 14px;
line-height: 20px;
margin-bottom: 0;
margin-top: 0;
padding: 10px 10px;
width: 100%;
box-sizing: border-box;
overflow-y: initial;
}
#mlb2-581356.ml-form-embedContainer .ml-form-embedWrapper .ml-form-embedBody .ml-form-horizontalRow button {
background-color: #C0DCE2 !important;
border-color: #C0DCE2;
border-style: solid;
border-width: 1px;
border-radius: 4px;
box-shadow: none;
color: #ffffff !important;
cursor: pointer;
font-family: ‘Montserrat’, sans-serif;
font-size: 14px !important;
font-weight: 400;
line-height: 20px;
margin: 0 !important;
padding: 10px !important;
width: 100%;
height: auto;
}
#mlb2-581356.ml-form-embedContainer .ml-form-embedWrapper .ml-form-embedBody .ml-form-horizontalRow button:hover {
background-color: #CAD9E0 !important;
border-color: #CAD9E0 !important;
}
#mlb2-581356.ml-form-embedContainer .ml-form-embedWrapper .ml-form-embedBody .ml-form-checkboxRow input[type=”checkbox”] {
box-sizing: border-box;
padding: 0;
position: absolute;
z-index: -1;
opacity: 0;
margin-top: 5px;
margin-left: -1.5rem;
overflow: visible;
}
#mlb2-581356.ml-form-embedContainer .ml-form-embedWrapper .ml-form-embedBody .ml-form-checkboxRow .label-description {
color: #000000;
display: block;
font-family: ‘Open Sans’, Arial, Helvetica, sans-serif;
font-size: 12px;
text-align: left;
margin-bottom: 0;
position: relative;
vertical-align: top;
}
#mlb2-581356.ml-form-embedContainer .ml-form-embedWrapper .ml-form-embedBody .ml-form-checkboxRow label {
font-weight: normal;
margin: 0;
padding: 0;
position: relative;
display: block;
min-height: 24px;
padding-left: 24px;
}
#mlb2-581356.ml-form-embedContainer .ml-form-embedWrapper .ml-form-embedBody .ml-form-checkboxRow label a {
color: #000000;
text-decoration: underline;
}
#mlb2-581356.ml-form-embedContainer .ml-form-embedWrapper .ml-form-embedBody .ml-form-checkboxRow label p {
color: #000000 !important;
font-family: ‘Open Sans’, Arial, Helvetica, sans-serif !important;
font-size: 12px !important;
font-weight: normal !important;
line-height: 18px !important;
padding: 0 !important;
margin: 0 5px 0 0 !important;
}
#mlb2-581356.ml-form-embedContainer .ml-form-embedWrapper .ml-form-embedBody .ml-form-checkboxRow label p:last-child {
margin: 0;
}
#mlb2-581356.ml-form-embedContainer .ml-form-embedWrapper .ml-form-embedBody .ml-form-embedSubmit {
margin: 0 0 20px 0;
float: left;
width: 100%;
}
#mlb2-581356.ml-form-embedContainer .ml-form-embedWrapper .ml-form-embedBody .ml-form-embedSubmit button {
background-color: #C0DCE2 !important;
border: none !important;
border-radius: 4px !important;
box-shadow: none !important;
color: #ffffff !important;
cursor: pointer;
font-family: ‘Montserrat’, sans-serif !important;
font-size: 14px !important;
font-weight: 400 !important;
line-height: 21px !important;
height: auto;
padding: 10px !important;
width: 100% !important;
box-sizing: border-box !important;
}
#mlb2-581356.ml-form-embedContainer .ml-form-embedWrapper .ml-form-embedBody .ml-form-embedSubmit button.loading {
display: none;
}
#mlb2-581356.ml-form-embedContainer .ml-form-embedWrapper .ml-form-embedBody .ml-form-embedSubmit button:hover {
background-color: #CAD9E0 !important;
}
.ml-subscribe-close {
width: 30px;
height: 30px;
background: url(‘https://cdn.mailerlite.com/images/default/modal_close.png’) no-repeat;
background-size: 30px;
cursor: pointer;
margin-top: -10px;
margin-right: -10px;
position: absolute;
top: 0;
right: 0;
}
.ml-error input, .ml-error textarea, .ml-error select {
border-color: red!important;
}
.ml-error .custom-checkbox-radio-list {
border: 1px solid red !important;
border-radius: 0px;
padding: 10px;
}
.ml-error .label-description,
.ml-error .label-description p,
.ml-error .label-description p a,
.ml-error label:first-child {
color: #ff0000 !important;
}
#mlb2-581356.ml-form-embedContainer .ml-form-embedWrapper .ml-form-embedBody .ml-form-checkboxRow.ml-error .label-description p,
#mlb2-581356.ml-form-embedContainer .ml-form-embedWrapper .ml-form-embedBody .ml-form-checkboxRow.ml-error .label-description p:first-letter {
color: #ff0000 !important;
}
@media only screen and (max-width: 400px){
.ml-form-embedWrapper.embedDefault, .ml-form-embedWrapper.embedPopup { width: 100%!important; }
.ml-form-formContent.horozintalForm { float: left!important; }
.ml-form-formContent.horozintalForm .ml-form-horizontalRow { height: auto!important; width: 100%!important; float: left!important; }
.ml-form-formContent.horozintalForm .ml-form-horizontalRow .ml-input-horizontal { width: 100%!important; }
.ml-form-formContent.horozintalForm .ml-form-horizontalRow .ml-input-horizontal > div { padding-right: 0px!important; padding-bottom: 10px; }
.ml-form-formContent.horozintalForm .ml-button-horizontal { width: 100%!important; }
.ml-form-formContent.horozintalForm .ml-button-horizontal.labelsOn { padding-top: 0px!important; }
}
.ml-mobileButton-horizontal { display: none; }
#mlb2-581356 .ml-mobileButton-horizontal button {
background-color: #C0DCE2 !important;
border-color: #C0DCE2 !important;
border-style: solid !important;
border-width: 1px !important;
border-radius: 4px !important;
box-shadow: none !important;
color: #ffffff !important;
cursor: pointer;
font-family: ‘Montserrat’, sans-serif !important;
font-size: 14px !important;
font-weight: 400 !important;
line-height: 20px !important;
padding: 10px !important;
width: 100% !important;
}
@media only screen and (max-width: 400px) {
#mlb2-581356.ml-form-embedContainer .ml-form-embedWrapper .ml-form-embedBody .ml-form-formContent.horozintalForm {
padding: 0 0 10px 0 !important;
}
.ml-hide-horizontal { display: none !important; }
.ml-form-formContent.horozintalForm .ml-button-horizontal { display: none!important; }
.ml-mobileButton-horizontal { display: inline-block !important; margin-bottom: 20px;width:100%; }
.ml-form-formContent.horozintalForm .ml-form-horizontalRow .ml-input-horizontal > div { padding-bottom: 0px !important; }
}
@media only screen and (max-width: 400px) {
.ml-form-formContent.horozintalForm .ml-form-horizontalRow .horizontal-fields {
margin-bottom: 10px !important;
width: 100% !important;
}
}
function ml_webform_success_581356() {
var $ = ml_jQuery || jQuery;
$(‘.ml-subscribe-form-581356 .row-success’).show();
$(‘.ml-subscribe-form-581356 .row-form’).hide();
}
Thank you!
You have successfully joined our subscriber list.

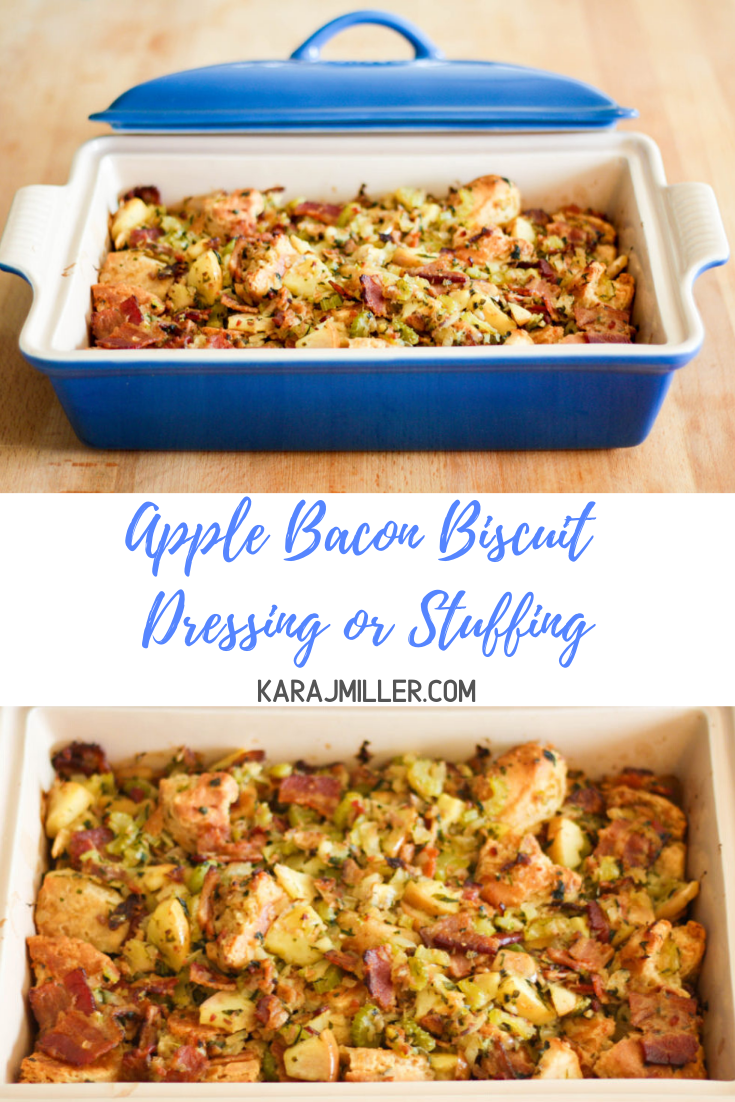
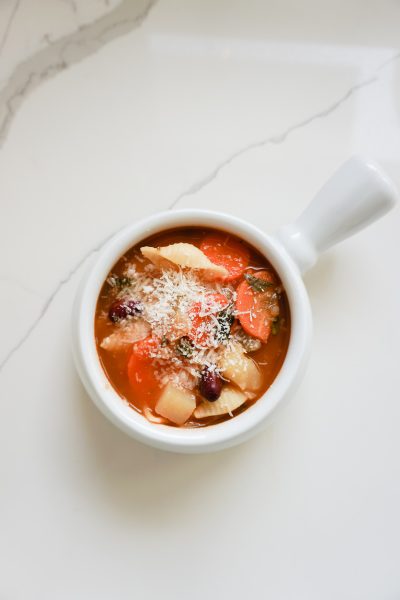
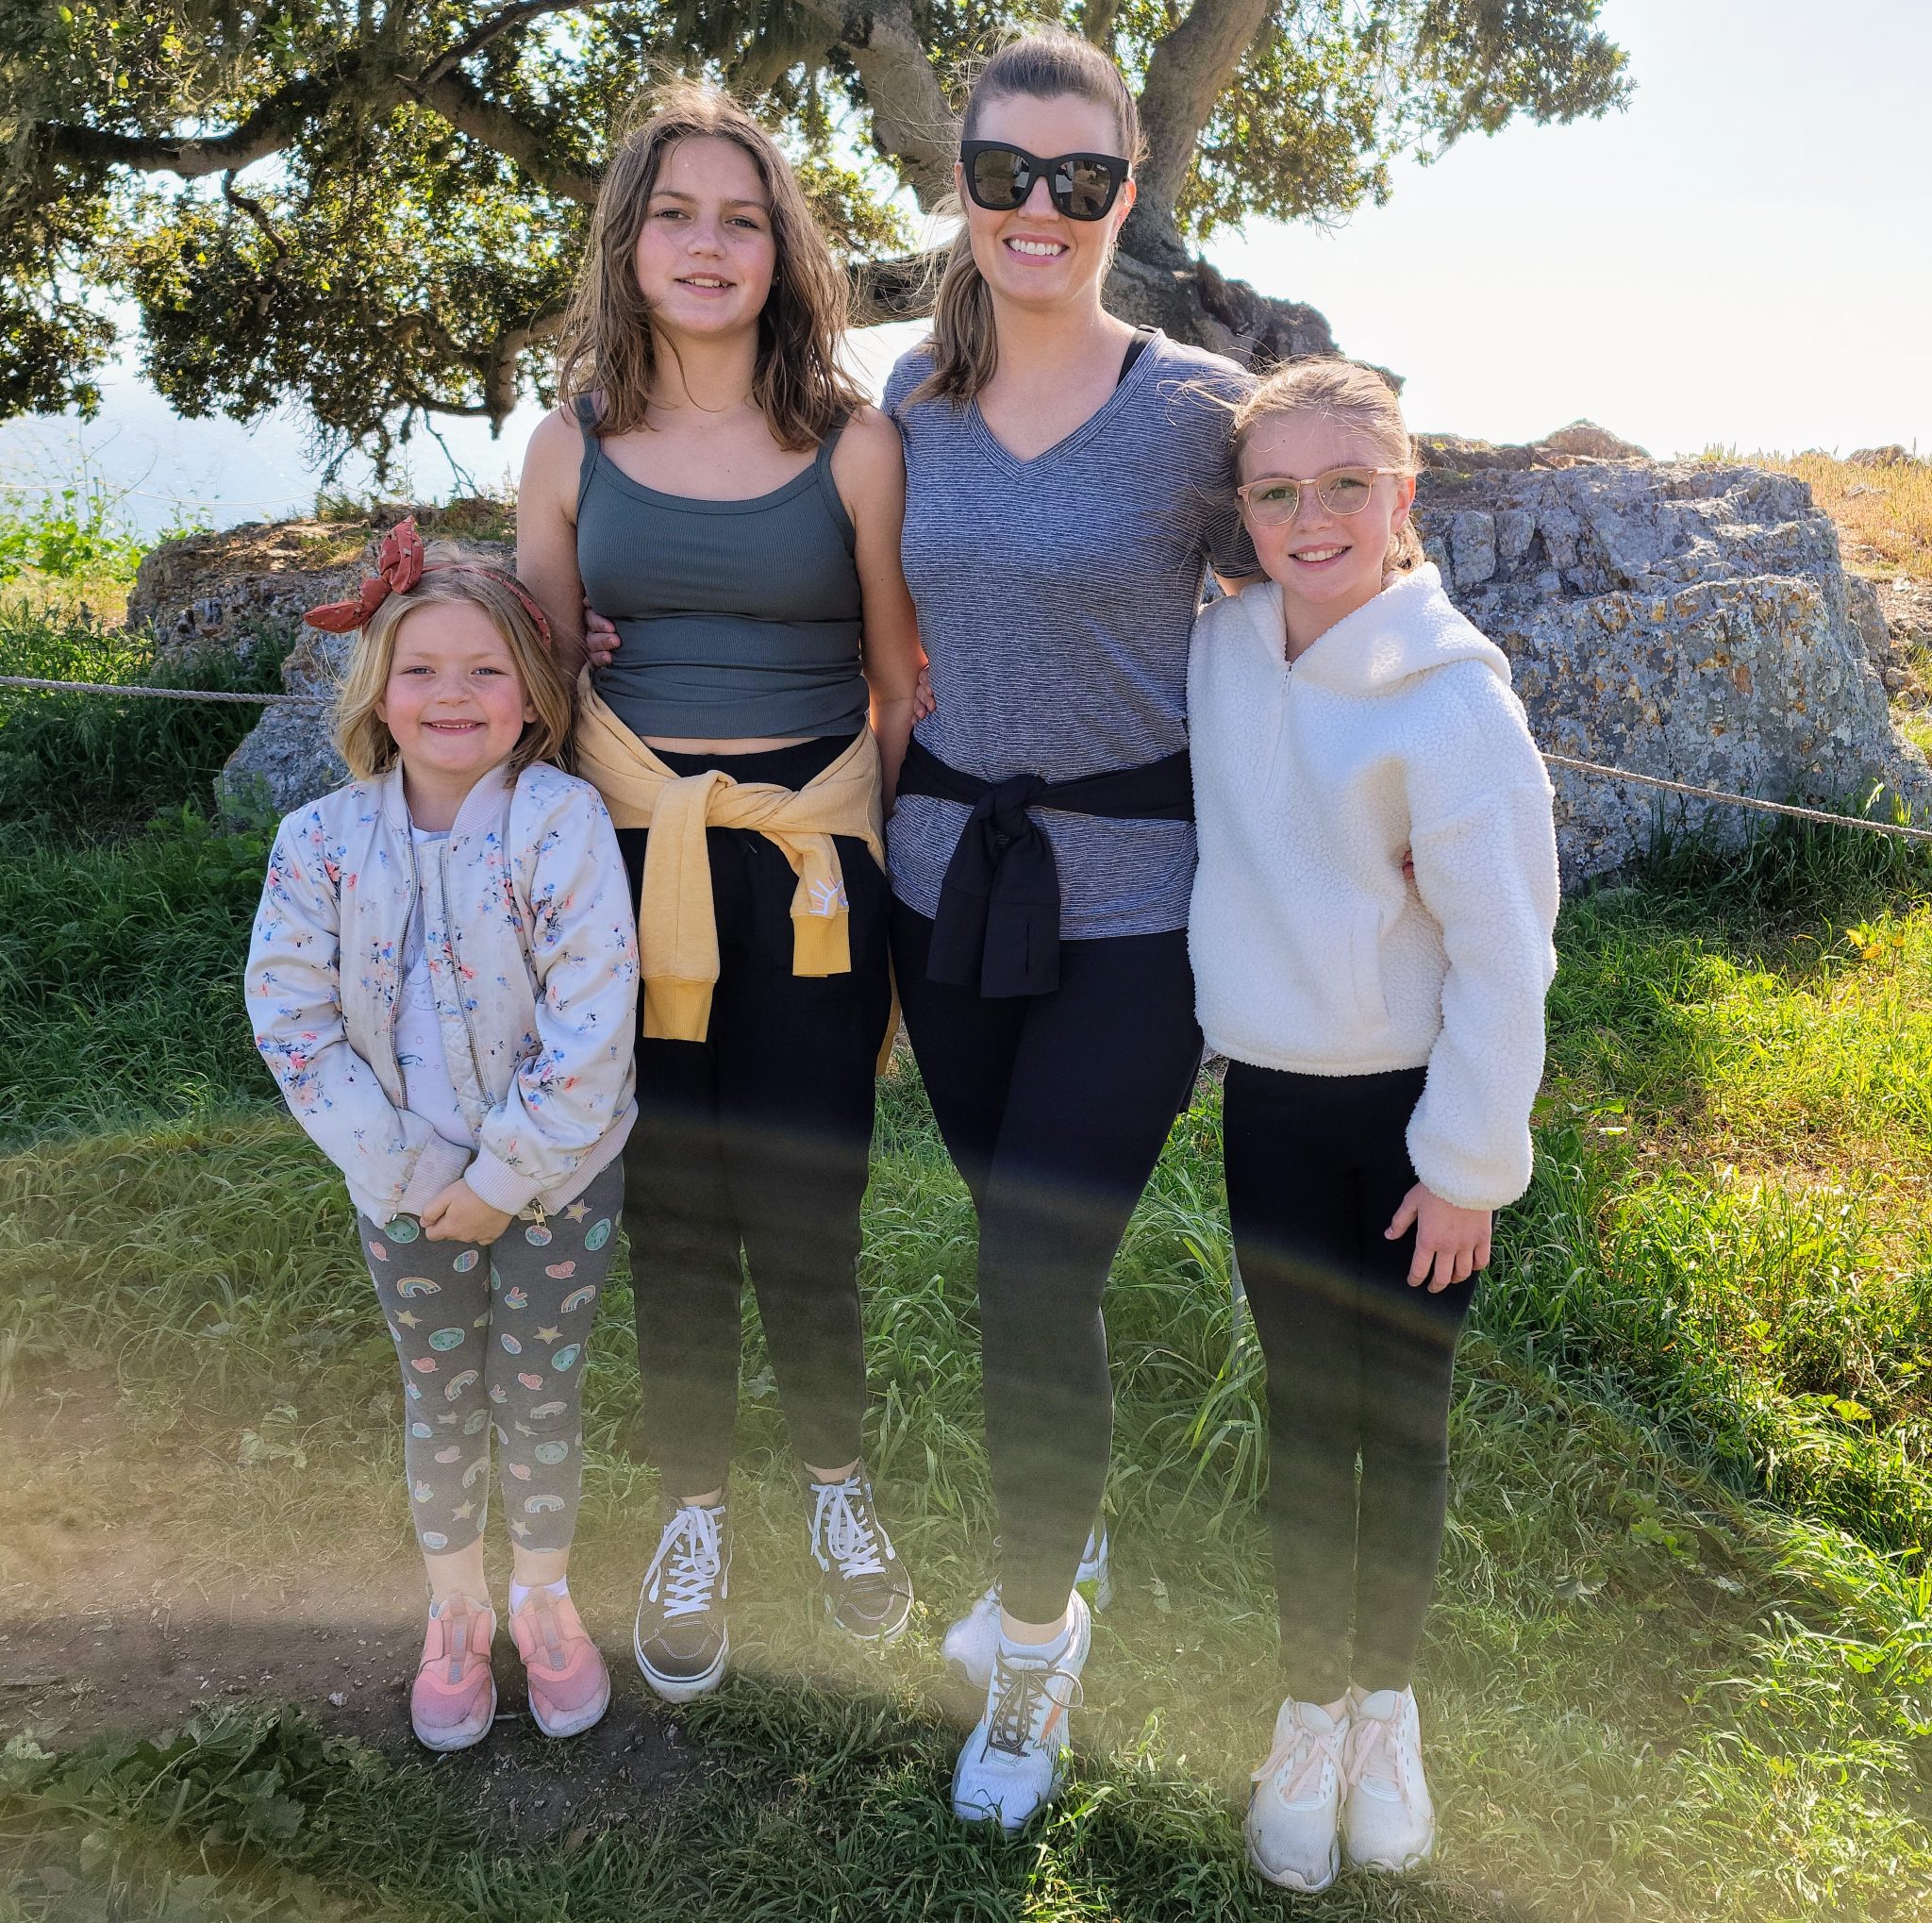
Hey There, I’m Kara!
A California Mom Blogger who wants to help you feel positive and fulfilled in your life. I share tried and true food recipes, tips for family travel, and deals on the latest things that I love. It’s simple, I like to eat and laugh!